This website is being sponsored by Google Ads.
Are you using an ad blocker? Then you're also blocking my earnings from advertisements....
If you wish to support this website, you can (temporarily?) switch off your ad blocker. Thanks in advance....
Remove old kernels
4. After a kernel update, the old kernel still shows in the Grub boot menu, under the header: "Previous Linux versions"
(In Ubuntu 12.10 this header is called "Advanced options for Ubuntu"). Because you might want to start your machine with the old kernel, if the new kernel doesn't function well.
So far, so good. But having more than one redundant kernel, is superfluous and a waste of disk space. This is how you can remove old
kernels and thereby clean up the Grub boot loader menu as well:
An Ubuntu version sticks to the main kernel version it had on release date. Kernel updates are only minor versions of that main version.
For example: Ubuntu 12.04 was first released with 3.2.
0-23. It will always remain 3.2.
0, but the minor version number receives regular updates.
Now let's get started (based on the example of 12.04):
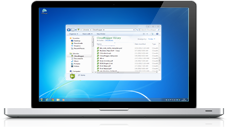
Click on the grey Ubuntu logo (Dash home). Query:
synaptic.
Click on Synaptic Package Manager.
query:
kernel 3.
(use the Search button and not the buggy Quick search)
Mark all installed kernels that you want to remove, for "complete removal". You should find that each kernel version has at least
three installed packages; remove all three of them (usually two headers packages and one image package). Press the Apply button in the panel.
Tip: leave the newest redundant old kernel intact, just to be on the safe side.
Now reboot your computer. The Grub menu should be cleansed.
Ready! That's all you ever need to do. Doing more is risky and not advisable.
Note: don't use cleaning applications like Computer Janitor. They are dangerous and at best nearly useless.
The registry
5. There's no need to clean the registry of Linux, as it can't get polluted in the first place. For the following reasons:
- Only the operating system itself has a central registry. The configurations of the applications aren't in there, because they don't
have access to it. So they can't mess it up. They place their own default settings in their own folders in the system.
- applications place upon installation a hidden settings file in the personal folder of each user. That's the only settings file that a user has access to. More or less like MS-DOS did, when each application only created it's own .ini file with it's settings.
- each user has his own hidden copy of the central registry in his personal folder. That copy is the only thing that he can mess up, not the registry of another user account.
Want more?
Do you want more tips and tweaks for Ubuntu? There's
a lot more of them on this website! For example
10 fatal mistakes that you'll want to avoid in Ubuntu.
To the content of this website applies a Creative Commons license.


Special thanks,about three days im tryin’ to install Gyachi at the last i found this solution.Thanksssssssssssssssssssssssssssssssssssssssssssssssssssssssssssss
My pleasure, I’m glad to hear that!
This made it SO much easier – thank you. If only these notes were with the download file I might still have some hair.
Was not able to make this work on mint 14 thats based on ubuntu 12.10
Thank you very much, I’ll try first